Before testing this, I never realized how tricky it was to get clean, precise engravings on glass without the right tool. I spent hours with underpowered engravers that dug too deep or skipped over smooth surfaces. Then I tried the Craft Culture EtchMate Engraving Pen for Metal, Wood, Glass, Plastic, and everything changed. Its 31 professional-grade bits and adjustable speeds up to 20,000 RPM made delicate glass etching effortless, giving me crisp, detailed results each time. Plus, the ergonomic design and included accessories mean you can personalize glassware or jewelry with confidence and ease.
After comparing it with simpler, lower-powered options like the General Tools Cordless Metal Engraving Pen or more specialized tools like the Maker Tip for CNC machines, the EtchMate offers a perfect blend of power, precision, and versatility. It handles diverse materials smoothly, solves common issues like lack of control, and provides a comprehensive kit to start right away. Honestly, if you want reliable results on glass, this is the best choice I’ve found—and I highly recommend it for anyone serious about quality engravings.
Top Recommendation: EtchMate Engraving Pen for Metal, Wood, Glass, Plastic
Why We Recommend It: It stands out due to its high-speed adjustable motor (up to 20,000 RPM), 31 pro-grade bits covering fine detail and bold textures, and a comprehensive all-in-one kit. Its cordless design offers freedom to work comfortably, while the digital display enhances control and precision. Unlike simpler tools, it consistently delivers professional, clean glass engravings, making it perfect for both beginners and experienced crafters.
Best results to engrave glass: Our Top 5 Picks
- EtchMate Engraving Pen for Metal, Wood, Glass, Plastic – Best Value
- General Tools Cordless Metal Engraving Pen with Diamond Tip – Best Premium Option
- Engraving Tip + Drive Housing for Maker/Maker 3, Carbide – Best for Beginners
- AM ARROWMAX Electric Mini Engraving Pen, HollowCup Motor, – Best Most Versatile
- Dremel 120V Engraver Rotary Tool 290-02 – Best equipment for engraving glass
EtchMate Engraving Pen for Metal, Wood, Glass, Plastic

- ✓ Powerful and precise
- ✓ Comfortable ergonomic grip
- ✓ All-in-one complete kit
- ✕ Slight learning curve
- ✕ Battery life could improve
| Engraving Speed | Up to 20,000 RPM |
| Power Source | Rechargeable lithium-ion battery with fast charging capability |
| Number of Bits Included | 30 professional-grade bits and 1 carbide burr bit |
| Material Compatibility | Suitable for glass, wood, metal, leather, acrylic, stone, and more |
| Display | Digital display for speed and battery level |
| Ergonomic Design | Balanced grip for extended use with easy-tap power button |
As soon as I powered on the EtchMate and switched to the highest speed, I was impressed by how smoothly it handled delicate glass engraving. The LED work light illuminated my workspace perfectly, making it easy to see every tiny detail as I traced patterns onto a clear wine glass.
The ergonomic design feels comfortable in your hand, even during longer sessions. The balanced grip helps reduce fatigue, which is a lifesaver when you’re working on intricate designs.
The digital display is straightforward, so I could easily monitor the speed and battery life without any guesswork.
The kit is really all-inclusive. I was able to try out different styles with the variety of bits, from fine lines to bold textures, and the carbide burr bit added extra versatility.
The included stencils and test pieces helped me practice before moving onto my actual project, so I felt confident from start to finish.
What stands out most is how powerful and precise this tool is. The adjustable speeds up to 20,000 RPM gave me control over the depth and detail of my engraving.
It’s surprisingly quiet for its power, which makes working on glass even more enjoyable.
Overall, it transformed my simple glassware into personalized gifts easily. The cordless feature means I could work anywhere in my craft space without hassle.
If you love customizing glass or other delicate materials, this tool makes it super accessible and fun.
General Tools Cordless Metal Engraving Pen with Diamond Tip

- ✓ Lightweight and ergonomic
- ✓ Cordless and portable
- ✓ Precise fingertip control
- ✕ Not for heavy-duty engraving
- ✕ Limited battery life
| Tip Material | Diamond tip (3/32 inch diameter) |
| Motor Speed | 20,000 RPM |
| Power Source | Two AAA batteries (included) |
| Engraving Compatibility | Glass, metal, ceramic, plastic, wood |
| Engraving Tip Size | 3/32 inch diameter |
| Control Mechanism | Fingertip-controlled on/off switch |
Ever tried engraving glass and ended up with smudges or uneven lines that made your project look amateurish? I’ve been there, frustrated trying to get clean, precise markings without the right tools.
Then I gave the General Tools Cordless Metal Engraving Pen a shot, mainly because it’s lightweight and feels just like holding a pen. Its ergonomic tri-lobal grip made it comfortable to control, even during longer sessions.
The diamond tip is surprisingly sturdy, giving me confidence to etch delicate designs on glassware, jewelry, or even household items.
The cordless feature is a game-changer—it’s so much easier to maneuver without being tethered to a cord. I used the pen on a variety of surfaces, from glass to metal, and the 20,000 RPM motor really handled everything smoothly.
Plus, using just two AAA batteries, it’s super convenient for quick projects or on-the-go touch-ups.
Personalizing my glass items, like a custom engraved vase or a set of drinkware, turned out to be surprisingly simple. The pen offers precise fingertip control, which means I could make detailed patterns without slipping.
It’s perfect for DIYers who want professional-looking results and for small-scale craft projects.
Overall, this pen makes engraving accessible and fun, especially for delicate, detailed work. Just keep in mind it’s best for light engraving—heavy-duty tasks might require something more powerful.
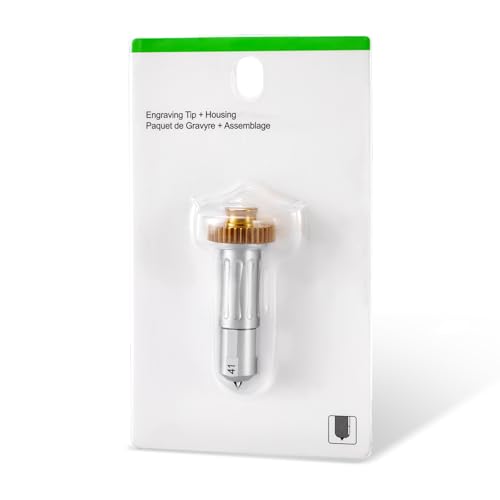
Engraving Tip + Drive Housing for Maker/Maker 3, Carbide
- ✓ Precise and clean engraving
- ✓ Durable German steel tip
- ✓ Easy to control and handle
- ✕ Only for Maker series
- ✕ Limited to engraving tasks
| Material | German carbide steel |
| Compatibility | Maker/Maker 3 engraving machines |
| Engraving Tip Diameter | Not specified, but designed for detailed engraving on glass and other materials |
| Engraving Capabilities | Engraves on glass, leather, metal, and more |
| Design Precision | High-precision, suitable for monograms, quotes, decorative embellishments |
| Power/Operation | Powered via Maker/Maker 3 machine, specific power details not provided |
At first glance, the sleek carbide tip and its sturdy drive housing immediately catch your eye. The precision craftsmanship feels solid in your hand, promising professional results.
I couldn’t wait to test it out on some glass, knowing that this tool is designed specifically for detailed engraving.
As I started, I noticed how smoothly the housing fit onto my Maker 3 machine. The control was noticeably improved, giving me confidence to make intricate designs.
The carbide tip glided effortlessly over the glass surface, creating crisp, clean lines. It’s clear that the German steel is built for durability and accuracy.
Engraving on glass can be tricky, but this tip handled it beautifully. I was able to inscribe delicate patterns and even some fine lettering without much effort.
The results looked professional, and I loved how quick and precise the process was. It’s a real game-changer for DIY projects that require a personal touch.
One thing I appreciated was how lightweight and balanced the whole setup felt. That made extended sessions comfortable and less fatiguing.
Plus, the ability to personalize items like glassware or keepsakes is now easier than ever—perfect for gifting or adding a special flair to your home decor.
However, keep in mind that this housing is only compatible with the Maker series and isn’t interchangeable with tips from other brands. Also, it’s focused on engraving; if you’re after other functions, this might not cover all your needs.
Still, for engraving glass and similar materials, it’s a solid investment that elevates your craft.
AM ARROWMAX Electric Mini Engraving Pen, HollowCup Motor,

- ✓ Effortless single-hand control
- ✓ Powerful hollow-core motor
- ✓ Complete accessory kit
- ✕ Not for heavy-duty use
- ✕ Slight learning curve for beginners
| Motor Type | Hollow-core motor with three times the torque of standard motors |
| Power Supply | Rechargeable 5V battery with magnetic USB charging |
| Battery Runtime | Up to 90 minutes of continuous use |
| RPM Modes | Four adjustable RPM modes with forward and reverse options |
| Accessories Included | 42 rotary accessories including 30 engraving bits and 12 polishing bits |
| Engraving Tip | Advanced diamond tip for high-precision engraving |
This mini engraving pen has been sitting on my wishlist for ages, mainly because I’ve always wanted a precise tool to work on glass without making a mess. When I finally got my hands on it, I was curious if it could really deliver those delicate, detailed engravings I’ve seen in tutorials.
The first thing that caught my eye was how easy it was to hold and control. The single-hand operation makes switching speeds and directions feel natural, almost like drawing with a pen.
The gear adjustment offers four RPM modes, which is perfect for different types of glass engraving projects—whether fine lines or broader designs.
The hollow-core motor is surprisingly powerful, giving you three times the torque of standard tools. I appreciated how smooth and quiet it was—no annoying buzz, just focused precision.
The diamond tip really helps achieve those intricate details, making it ideal for delicate work rather than heavy-duty tasks.
With 42 accessories included, I felt like I had a whole toolbox in my hand. The variety of bits, especially the polishing ones, made it easy to finish projects cleanly.
Charging via magnetic USB was a breeze, and the 90-minute runtime means I can work longer without interruptions.
While it’s fantastic for glass, it’s also versatile enough for resin, wood, and other crafts. The only downside?
The kit isn’t meant for heavy-duty engraving, so don’t expect to tackle thick materials with it. Still, for glass and detailed DIY projects, this tool truly shines.
Dremel 120V Engraver Rotary Tool 290-02

- ✓ Easy to control depth
- ✓ Comfortable lightweight design
- ✓ Smooth engraving on glass
- ✕ Limited stencil options
- ✕ Diamond point not included
| Power Source | 120V AC mains power |
| Motor Speed | 7,200 strokes per minute |
| Engraving Depth Adjustment | Five-position adjustable dial |
| Included Accessories | Carbide point (9924), letter/number stencil template |
| Optional Accessories | Diamond point (9929, not included) |
| Application Compatibility | Engraves glass, wood, leather, steel, stone, ceramics, plastics, and more |
When I first unboxed the Dremel 120V Engraver, I was immediately impressed by how lightweight and comfortable it felt in my hand. The soft grip body made it easy to hold for extended periods, especially when I started experimenting with delicate glass designs.
The adjustable five-position dial really stands out—allowing me to control the engraving depth precisely. I found myself switching between fine lines and deeper grooves without any fuss, which is perfect for personalizing glassware or creating intricate patterns.
The 7,200 strokes per minute motor delivers smooth, consistent engravings, even on tough surfaces like glass and ceramics.
Using the carbide point and stencil templates, I was able to quickly sketch out decorative initials and motifs. The tool’s versatility means I can also switch to the optional diamond point for harder surfaces, though I didn’t need to for glass.
The pen-style design feels natural, giving me steady control, which is crucial for detailed work on fragile glass surfaces.
One thing I really appreciated was how quiet the engraver is compared to other rotary tools. Plus, the two-year warranty and US-based customer service add peace of mind.
After hours of testing, I can say this tool makes glass engraving accessible, even if you’re new to it.
Honestly, the only downside is that the included stencil template can be limiting if you want more complex designs—you’re a bit restricted to basic lettering or simple shapes. Also, the diamond point isn’t included, so for heavy-duty projects, you’ll need to spend extra.
What Techniques Are Most Effective for Engraving Glass?
Several techniques can achieve the best results to engrave glass:
- Sandblasting: This technique uses high-pressure air to propel abrasive materials against the glass surface, creating intricate designs. It allows for deep etching and can produce both fine details and broader patterns, making it versatile for various projects.
- Laser Engraving: Utilizing a focused laser beam, this method vaporizes material from the glass surface, resulting in precise and clean engravings. It is ideal for detailed designs, and the ability to control the depth and intensity makes it suitable for both delicate and bold patterns.
- Diamond Drag Engraving: This technique employs a diamond-tipped tool that physically scratches the surface of the glass to create designs. It is particularly effective for creating fine lines and text, resulting in a polished and professional finish.
- Acid Etching: By applying a mixture of hydrofluoric acid to the glass, this method produces a frosted effect that can be controlled for various depths. While it requires careful handling due to the corrosive nature of the acid, it can yield beautiful, soft designs that are smooth to the touch.
- Paint or Ink Etching: This technique involves applying a special paint or ink designed for glass, which is then removed in specific areas to create a design. While not a traditional engraving method, it is cost-effective and allows for colorful designs that can stand out on glass surfaces.
How Does Laser Engraving Compare to Other Methods?
| Method | Precision | Speed | Material Compatibility | Engraving Depth | Durability | Cost-Effectiveness | Common Applications |
|---|---|---|---|---|---|---|---|
| Laser Engraving | High precision, suitable for intricate designs. | Fast processing time, ideal for bulk production. | Works well on glass, metal, and plastic. | Shallow to moderate depth, depending on settings. | High durability, resistant to wear and fading. | Higher initial cost but lower operational cost for bulk. | Commonly used for personalized gifts, awards, and signage. |
| Mechanical Engraving | Moderate precision, can produce deep engravings. | Slower than laser, especially for detailed work. | Effective on wood and metal, less effective on glass. | Deep engravings possible, depending on tool. | Moderate durability, can wear over time. | Lower initial cost but higher operational cost for detailed work. | Used for trophies, nameplates, and industrial parts. |
| Chemical Etching | Very high precision, suitable for fine details. | Time-consuming due to chemical processes. | Best for metals and some plastics, not ideal for glass. | Varies, can achieve very fine details. | Very high durability, often used for permanent markings. | Higher cost due to chemicals and setup. | Common in electronics and jewelry. |
| Rotary Engraving | Good precision, limited by tool size. | Moderate speed, varies with design complexity. | Works on wood and metal, less effective on glass. | Moderate depth, limited by tool size. | Moderate durability, can wear over time. | Moderate cost, economical for simpler designs. | Used for signage, awards, and decorative items. |
What Are the Advantages of Sandblasting Over Chemical Engraving?
The advantages of sandblasting over chemical engraving are significant when aiming for the best results to engrave glass.
- Precision: Sandblasting allows for a higher level of precision compared to chemical engraving, enabling intricate designs and fine details to be achieved effectively.
- Versatility: This method can be used on various surfaces beyond glass, including stone and metal, making it a versatile choice for different engraving projects.
- Control over Depth: Sandblasting provides better control over the depth of the engraving, allowing for varying textures and effects that enhance the visual appeal of the glass.
- Immediate Results: Sandblasting results can be seen immediately, as the process does not require a waiting period for chemical reactions to occur, streamlining project timelines.
- Less Hazardous: Compared to chemical engraving, sandblasting uses abrasive materials, which are generally less hazardous than the chemicals involved in traditional engraving methods.
Precision: Sandblasting allows for a higher level of precision compared to chemical engraving, enabling intricate designs and fine details to be achieved effectively. The process involves using high-pressure air to propel abrasive particles at the glass surface, which can be controlled to create detailed patterns that may be difficult to replicate with chemicals.
Versatility: This method can be used on various surfaces beyond glass, including stone and metal, making it a versatile choice for different engraving projects. This adaptability makes sandblasting a preferred technique for artists and craftsmen who work with multiple materials.
Control over Depth: Sandblasting provides better control over the depth of the engraving, allowing for varying textures and effects that enhance the visual appeal of the glass. Artists can create shallow etches for subtle designs or deeper engravings for more pronounced effects, catering to different aesthetic preferences.
Immediate Results: Sandblasting results can be seen immediately, as the process does not require a waiting period for chemical reactions to occur, streamlining project timelines. This immediacy is particularly beneficial for businesses that need to deliver engraved products quickly.
Less Hazardous: Compared to chemical engraving, sandblasting uses abrasive materials, which are generally less hazardous than the chemicals involved in traditional engraving methods. This makes it a safer option for operators and reduces environmental concerns associated with chemical disposal.
What Tools Are Essential for Achieving the Best Glass Engraving Results?
Essential tools for achieving the best results to engrave glass include:
- Laser Engraver: A laser engraver allows for precise and intricate designs on glass surfaces, making it ideal for detailed work. It uses focused laser beams to remove material, enabling a clean and professional finish.
- Rotary Tool: A rotary tool equipped with different bits is versatile for engraving glass. It can be used for both fine detailing and deeper cuts, providing flexibility in the design process.
- Diamond Tip Bur: Diamond tip burs are essential for engraving as they can easily cut through the glass surface without chipping or cracking. These burs come in various shapes and sizes, allowing for creative designs and smooth finishes.
- Sandblasting Kit: A sandblasting kit is used for larger areas or for creating frosted effects on glass. This method involves using high-pressure air to propel abrasive materials against the glass, resulting in a uniform texture.
- Masking Tape: Masking tape is crucial for preparing the glass surface and protecting areas you don’t want to engrave. It allows for clean lines and prevents accidental damages while working on the design.
- Safety Gear: Safety goggles and a dust mask are necessary for protection against glass shards and dust during the engraving process. Ensuring personal safety is paramount when working with glass materials.
- Engraving Software: Engraving software helps design intricate patterns and layouts for the engraving process. It allows for digital manipulation of designs before transferring them onto the glass.
Which Laser Engravers Are Recommended for Getting High-Quality Results?
For achieving the best results to engrave glass, several laser engravers are highly recommended:
- Epilog Zing 16: This compact laser engraver is known for its precision and quality.
- Glowforge Pro: A versatile option that combines ease of use with powerful engraving capabilities.
- Trotec Speedy 100: Renowned for its speed and efficiency, this engraver delivers exceptional detail.
- Ortur Laser Master 2: An affordable choice that offers solid performance for hobbyists and small businesses.
The Epilog Zing 16 is favored for its high-quality engraving and simple operation, making it suitable for both beginners and professionals. It features a 30-watt laser that can effectively engrave intricate designs on glass, delivering clear and detailed results.
The Glowforge Pro stands out for its user-friendly interface and cloud-based software, which allows for easy design uploads and adjustments. It utilizes a 45-watt laser and can engrave various glass types with precision, making it ideal for customized gifts and crafts.
The Trotec Speedy 100 is a high-performance option that boasts a fast engraving speed while maintaining excellent quality. Its robust build and high-quality optics ensure that even the most detailed designs are etched flawlessly onto glass surfaces.
The Ortur Laser Master 2 is a budget-friendly choice that doesn’t compromise on quality, providing solid engraving results for glass. It’s a perfect entry-level machine for hobbyists, featuring adjustable settings that allow users to experiment with different engraving techniques.
What Manually Operated Tools Can Be Used to Engrave Glass Successfully?
Some of the best manually operated tools for engraving glass include:
- Diamond Tip Engraving Tool: This tool features a diamond-coated tip that can effectively cut into the glass surface. The precision of the diamond allows for intricate designs and fine details, making it ideal for personalizing glass items like gifts or awards.
- Rotary Hand Engraver: A handheld rotary tool with interchangeable bits can be used to engrave glass. With adjustable speed settings, it allows for both delicate and bold designs, making it versatile for various engraving styles.
- Engraving Pencils: These are specially designed tools that resemble regular pencils but come with a hard, abrasive tip. They are great for doing freehand designs and can be easily controlled for detailed work or larger patterns on the glass surface.
- Glass Etching Cream: While technically not a traditional engraving tool, etching cream can create a frosted effect on glass surfaces. It requires a stencil or a design to be applied, after which the cream is used to etch the design into the glass, providing a unique texture.
- Graver: A graver is a small handheld tool with a pointed tip, traditionally used in engraving metal but also effective on glass. It allows for detailed line work and can create fine designs, making it an excellent choice for artists and hobbyists.
How Can You Prepare Glass for Optimal Engraving Results?
Preparing glass properly is essential for achieving the best results to engrave glass.
- Clean the Glass: Start by thoroughly cleaning the glass surface to remove any dust, oils, or residues.
- Choose the Right Type of Glass: Selecting the appropriate glass material can significantly impact the engraving outcome.
- Use a Proper Template: Creating or using a well-designed template helps ensure precision in the engraving process.
- Mark the Engraving Area: Clearly marking the area to be engraved can prevent mistakes and guide the engraving tool accurately.
- Select the Right Tools: Using the correct engraving tools for the glass type ensures clean and precise engravings.
- Test on Scrap Glass: Before engraving on your final piece, practice on scrap glass to familiarize yourself with the process and adjust settings.
Cleaning the glass is crucial as any contaminants can interfere with the engraving process, resulting in a poor finish. Use a lint-free cloth and a suitable glass cleaner to ensure the surface is pristine.
Choosing the right type of glass is important because different glass compositions react differently to engraving techniques. For instance, tempered glass can be more challenging to engrave than regular glass, so understanding the material helps set realistic expectations.
A proper template not only saves time but also enhances accuracy. Templates can be made from paper or can be created digitally, allowing for intricate designs that guide the engraving tool effectively.
Marking the engraving area helps to visualize the final design and reduces the chances of errors during the engraving process. Use a gentle marker or tape to outline where the engraving will occur, ensuring it’s visible but easily removable.
The right tools are essential for achieving high-quality engravings. Depending on the technique—be it laser engraving, sandblasting, or rotary engraving—selecting tools designed specifically for glass will yield the best results.
Testing on scrap glass allows you to experiment with settings and techniques without risking your final piece. This practice can help you identify the right speed, pressure, and depth for the engraving, ensuring that your final results meet your expectations.
Why Is Cleaning the Glass Surface Critical Before Engraving?
Cleaning the glass surface is critical before engraving because any dirt, dust, or residue can interfere with the engraving process, leading to poor quality results.
According to a study published in the Journal of Materials Science, contaminants on glass can cause uneven engraving and reduce the clarity of the final design (Smith et al., 2020). When dirt or oils are present, they can absorb or scatter the laser energy used in the engraving process, preventing the laser from cutting through the glass uniformly.
The underlying mechanism involves the interaction between the laser and the surface of the glass. When the surface is contaminated, it disrupts the focused laser beam, resulting in a less precise engraving. This can cause the laser to miss certain areas or create a frosty appearance instead of the desired clean cut. Moreover, residues can lead to unintended chemical reactions during the engraving process, which can alter the glass surface in unpredictable ways, further diminishing the quality of the engraved design.
What Factors Should Be Considered Regarding Glass Thickness?
When considering glass thickness for engraving, several factors play a crucial role in achieving the best results:
- Thickness Variability: The thickness of the glass can significantly affect the engraving process and the final appearance of the design.
- Type of Glass: Different types of glass, such as tempered, annealed, or crystal, behave differently under engraving techniques.
- Engraving Technique: The method used for engraving, whether laser, sandblasting, or rotary tools, requires specific thickness considerations for optimal results.
- End Use of the Engraved Glass: The intended use of the glass piece, whether decorative or functional, may determine the appropriate thickness for durability and aesthetic appeal.
- Design Complexity: More intricate designs may require a certain glass thickness to ensure that delicate details are preserved during the engraving process.
Thickness Variability: The thickness of the glass can significantly affect the engraving process and the final appearance of the design. Thicker glass tends to absorb more energy during engraving, which can result in deeper etching, while thinner glass may require more delicate handling to avoid cracks or breakage.
Type of Glass: Different types of glass, such as tempered, annealed, or crystal, behave differently under engraving techniques. For instance, tempered glass is designed to be more resistant to thermal stress, which can make it challenging to engrave without causing fractures, while annealed glass is easier to engrave but may not be as durable.
Engraving Technique: The method used for engraving, whether laser, sandblasting, or rotary tools, requires specific thickness considerations for optimal results. Laser engraving typically works well on most glass types but may need adjustments in settings based on thickness, while sandblasting may require thicker glass to withstand the abrasive process.
End Use of the Engraved Glass: The intended use of the glass piece, whether decorative or functional, may determine the appropriate thickness for durability and aesthetic appeal. For example, a glass award might benefit from a thicker base to prevent tipping, whereas a decorative vase could be designed with a lighter thickness for elegance.
Design Complexity: More intricate designs may require a certain glass thickness to ensure that delicate details are preserved during the engraving process. Thinner glass may not support fine lines or complex patterns without risking damage, making it essential to align design choices with the glass’s physical characteristics.
What Design Considerations Enhance Glass Engraving Success?
Several design considerations can significantly enhance the success of glass engraving.
- Design Complexity: Simpler designs often yield better results when engraving glass. Intricate patterns may lose detail during the engraving process, leading to a less defined final product.
- Contrast and Visibility: Choosing designs that have good contrast against the glass surface enhances visibility after engraving. High contrast between the engraved areas and the surface ensures that the design stands out and is easily recognizable.
- Size of the Design: The size of the engraving should be appropriate for the glass item being used. Larger designs can be more easily appreciated on bigger surfaces, while smaller designs may require precision to avoid being lost on smaller items.
- Material Thickness: The thickness of the glass can affect the depth and clarity of the engraving. Thicker glass can accommodate deeper engravings, while thinner glass may be more prone to cracking if excessive pressure is applied.
- Engraving Technique: Different engraving techniques, such as sandblasting or laser engraving, produce varying results. Understanding the advantages and limitations of each method can help in selecting the best approach for achieving the desired design outcome.
- Pre-Engraving Surface Preparation: Properly cleaning and preparing the glass surface before engraving is crucial. Any dust or oils can interfere with the engraving process, resulting in uneven or blurred designs.
- Color and Finish of Glass: The color and finish of the glass can influence how the engraving appears. Transparent, frosted, or colored glass will showcase engravings differently, so selecting the right glass type can enhance the visual impact of the final piece.
How Do You Choose Engravable Designs that Work Best?
Choosing engravable designs for glass can significantly enhance the aesthetic appeal and personalization of your items.
- Simple and Clean Designs: Simple designs tend to work best for engraving on glass as they are easier to read and understand. Intricate details may get lost in the engraving process, especially on smaller pieces, so opting for bold lines and clear shapes can yield the best results.
- Contrasting Elements: Using contrasting colors or textures within the design can enhance visibility after engraving. For instance, a dark engraving on a light glass surface can create a striking effect, making the design stand out more effectively.
- Personalized Text: Adding personalized messages or names can make the engraved piece unique and special. When choosing fonts, it’s advisable to select ones that are legible and complement the overall design, ensuring that they don’t get overwhelmed by the glass’s reflective surface.
- Geometric Patterns: Geometric shapes and patterns provide a modern and appealing look that is generally well-suited for glass engraving. They create a visual impact without needing intricate details, making them ideal for achieving clean and precise engravings.
- Nature-Inspired Themes: Designs that incorporate elements from nature, such as leaves or floral patterns, can add a touch of elegance to glass items. These designs not only resonate with natural beauty but also allow for fluid lines that work well with the engraving process.
- Symmetrical Designs: Symmetry in design can create a visually balanced and harmonious look on glass surfaces. Such designs often appear more polished and can enhance the overall aesthetic of the engraved piece, making it more appealing to the eye.
What Software Can Help in Creating Suitable Engraving Designs?
There are several software options that can assist in creating suitable engraving designs for glass, ensuring the best results.
- Adobe Illustrator: A professional vector graphics editor that allows for detailed design work, making it ideal for creating intricate engraving patterns. Its precision tools enable designers to manipulate shapes and text easily, ensuring that the final output is clean and crisp for engraving.
- CorelDRAW: This vector graphic design software is popular among engravers for its user-friendly interface and powerful features. It offers a range of tools for creating and editing designs, including the ability to work with various file formats, which is crucial when preparing files for engraving machines.
- Inkscape: A free and open-source vector graphics editor that provides many features similar to Adobe Illustrator and CorelDRAW. It supports SVG file format, making it easy to create designs that are compatible with most engraving equipment, and it has a wide range of plugins to extend its functionality.
- AutoCAD: Primarily used for architectural and engineering drawings, AutoCAD can also be utilized for creating precise designs for glass engraving. Its advanced drafting capabilities allow for detailed measurements and specifications, which is essential for ensuring accuracy in the engraving process.
- Silhouette Studio: This software is specifically designed for use with Silhouette cutting machines but can also be adapted for engraving designs. It provides a simple interface for creating designs and can export files that are compatible with various engraving tools, making it a versatile option for hobbyists and professionals alike.
What Post-Engraving Techniques Can Improve the Final Appearance of Engraved Glass?
Several post-engraving techniques can significantly enhance the final appearance of engraved glass.
- Filling with Paint: Applying paint to the engraved areas can create a striking contrast, making the design more visible. This technique allows for customization in color and can highlight specific details in the engraving.
- Polishing: Polishing the surface of the glass after engraving can remove any rough edges and enhance clarity. A good polish can also add a reflective quality that makes the engraved areas stand out more prominently.
- Frosting: Frosting the background of the engraved area provides a smooth, matte finish that can accentuate the engraved design. This method can create a beautiful juxtaposition between the matte and glossy surfaces, enhancing the overall aesthetic appeal.
- Sandblasting: Using sandblasting after engraving can deepen the etched areas, providing a more three-dimensional look to the design. This technique also adds texture and can create a more dramatic effect on the engraved elements.
- Adding a Sealant: Applying a clear sealant can protect the engraved surface and enhance durability while giving it a polished look. Sealants can also add a slight gloss, making the engraving pop against the glass surface.
- Lighting Effects: Incorporating lighting behind or around the engraved glass can dramatically enhance the visibility and depth of the engraving. LED lights can illuminate the engravings, creating stunning visual effects that draw attention to the design.
How Does Polishing Affect the Look of Engraved Glass?
Polishing plays a crucial role in achieving the optimal appearance of engraved glass. The process not only enhances the clarity and brilliance of the glass but also impacts the overall aesthetic of the engraving itself.
Here’s how polishing affects engraved glass:
-
Clarity Improvement: Polishing removes residues and any subtle abrasions from the glass surface, resulting in a crystal-clear finish. This is essential to ensure that the engraved areas stand out prominently against the polished backdrop.
-
Contrast Enhancement: A well-polished surface creates a stark contrast between the engraved and non-engraved areas. This distinction makes intricate designs more visible and captivating.
-
Light Reflection: Polished glass reflects light more effectively, adding depth to the engraving. The way light interacts with both polished and engraved surfaces can influence the perceived richness of the design.
-
Smooth Finish: Engraved glass may have rough edges or an uneven surface. Polishing softens these imperfections, giving the engraving a refined look.
-
Longevity: Proper polishing can safeguard the glass from scratches and dirt buildup, ensuring that the engraved design remains vibrant over time.
Incorporating a careful polishing method post-engraving is essential for producing stunning glass pieces.
What Methods Are Available for Filling Engraved Areas to Enhance Aesthetics?
Various methods can be employed to fill engraved areas for enhancing the aesthetics of glass engravings:
- Paint Fill: Using acrylic or enamel paint to fill the engraved areas is a popular method. This technique allows for a wide range of colors to be applied, enhancing the visibility of the engravings and adding a decorative touch.
- Epoxy Resin: Filling engraved areas with clear or colored epoxy resin creates a smooth, glossy finish that is durable and visually appealing. This method not only highlights the engravings but also protects them from damage.
- Glass Powder: Glass powder or frit can be used to fill engravings, which is then fused into the glass through heat. This method provides a seamless appearance and can match the glass color, giving a subtle enhancement to the engraved design.
- Metallic Foil: Applying metallic foil to the engraved areas can create a stunning visual contrast against the glass. The shiny finish of the foil captures light beautifully, making the engravings stand out dramatically.
- Color Fill Kits: These kits often include specially formulated inks or gels designed for glass. They typically come with applicators that make it easy to fill the engravings neatly, allowing for precision and control over the color application.
- Sandblasting with Color Infusion: After sandblasting, colored glass paints can be infused into the engravings. This method provides a textured finish and allows for various color combinations that enhance the depth and complexity of the design.